
Netgear ReadyNAS is a line of network attached storage devices that allows you to centralize all your content into one place. The main benefit being that you can then access your content from one place. The Netgear ReadyNAS 102, released about a year ago, incorporates a new modern UI for web management, a marketplace for apps that can be installed, and additional backup tools for your computers and mobile devices. Overall, the ReadyNAS is a fairly intuitive system that should fit basic storage needs while providing additional features with app support (and is a distant descendant of the highly acclaimed Infrant NAS line).
Hardware
The ReadyNAS 102 is the base model for the home ReadyNAS series. It provides 2 bays for hard drives and the ability to swap drives if your storage needs should grow. The 100 series is meant for home use with multiple users accessing the device. Along with the 100 series, Netgear also has a step up in performance with their 300 series, but those devices are geared towards business office crowd.
You can purchase the 102 with or without hard drives depending on how much you want to spend, and whether or not you have extra drives sitting around. The base 102 model starts out at $199 (diskless) and goes up depending on storage amount. Other options for the ReadyNAS 100 series included a 4 bay option. Our loaner review unit arrived with two preinstalled 1TB drives in RAID 1 mode, meaning that the data was mirrored on both drives and the over storage space was 1TB. You have the option to put the device in RAID 0 which would provide double the storage at the loss of drive mirroring.
Unboxing and Setup
Unpacking the ReadyNAS, the drives were already installed. But if you buy the diskless version, it’s an easy installation nonetheless. Netgear provides a way to install drives without any tools. That’s a nice touch so that you don’t need to mess with small screws that would probably fall off the desk and get lost in the carpet anyways. 🙂
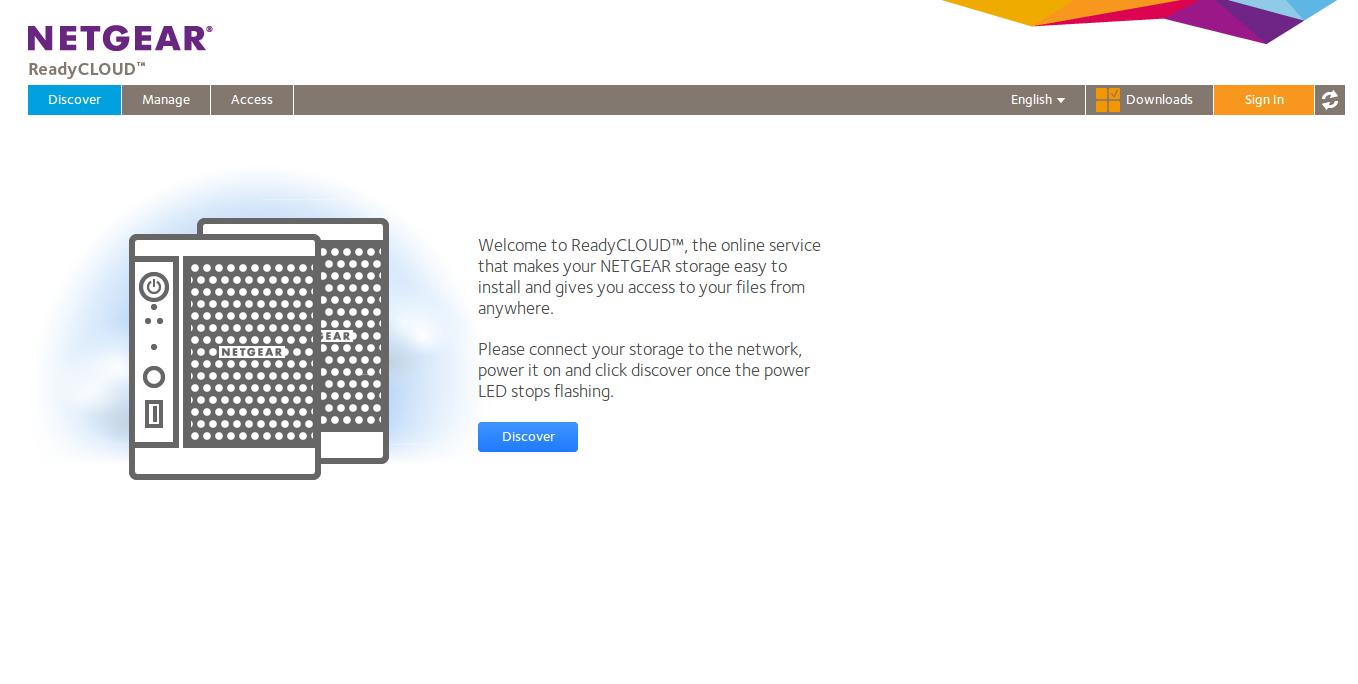
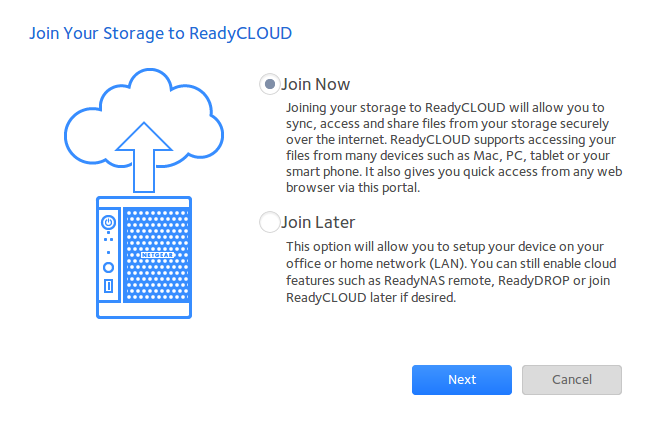
After connecting the network/power cable and let the ReadyNAS finish booting, you are ready to being setup. Setup is as easy as going to http://readycloud.netgear.com from your local network.
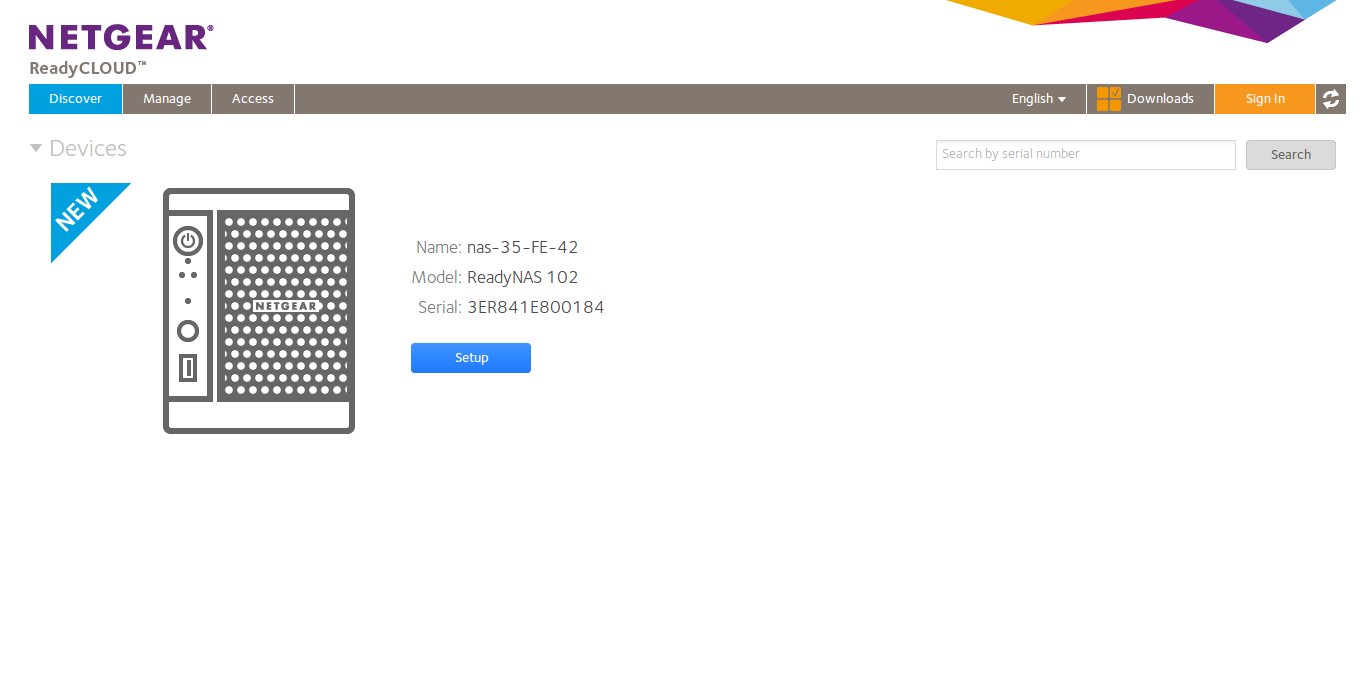
You click the discover button and any ReadyNAS boxes on your local
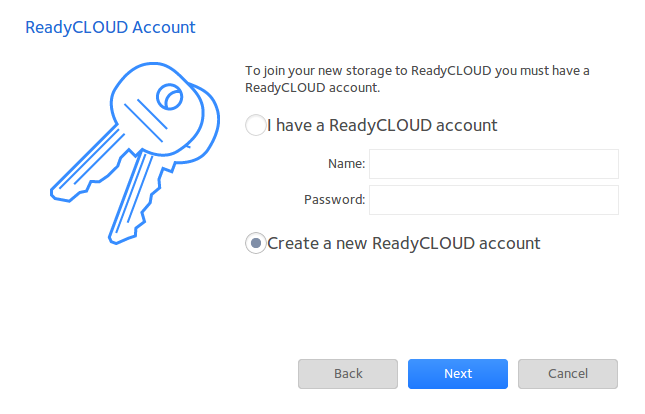
network will be found. You will then need to setup a ReadyCloud
account which provides both local and remote access to your ReadyNAS.
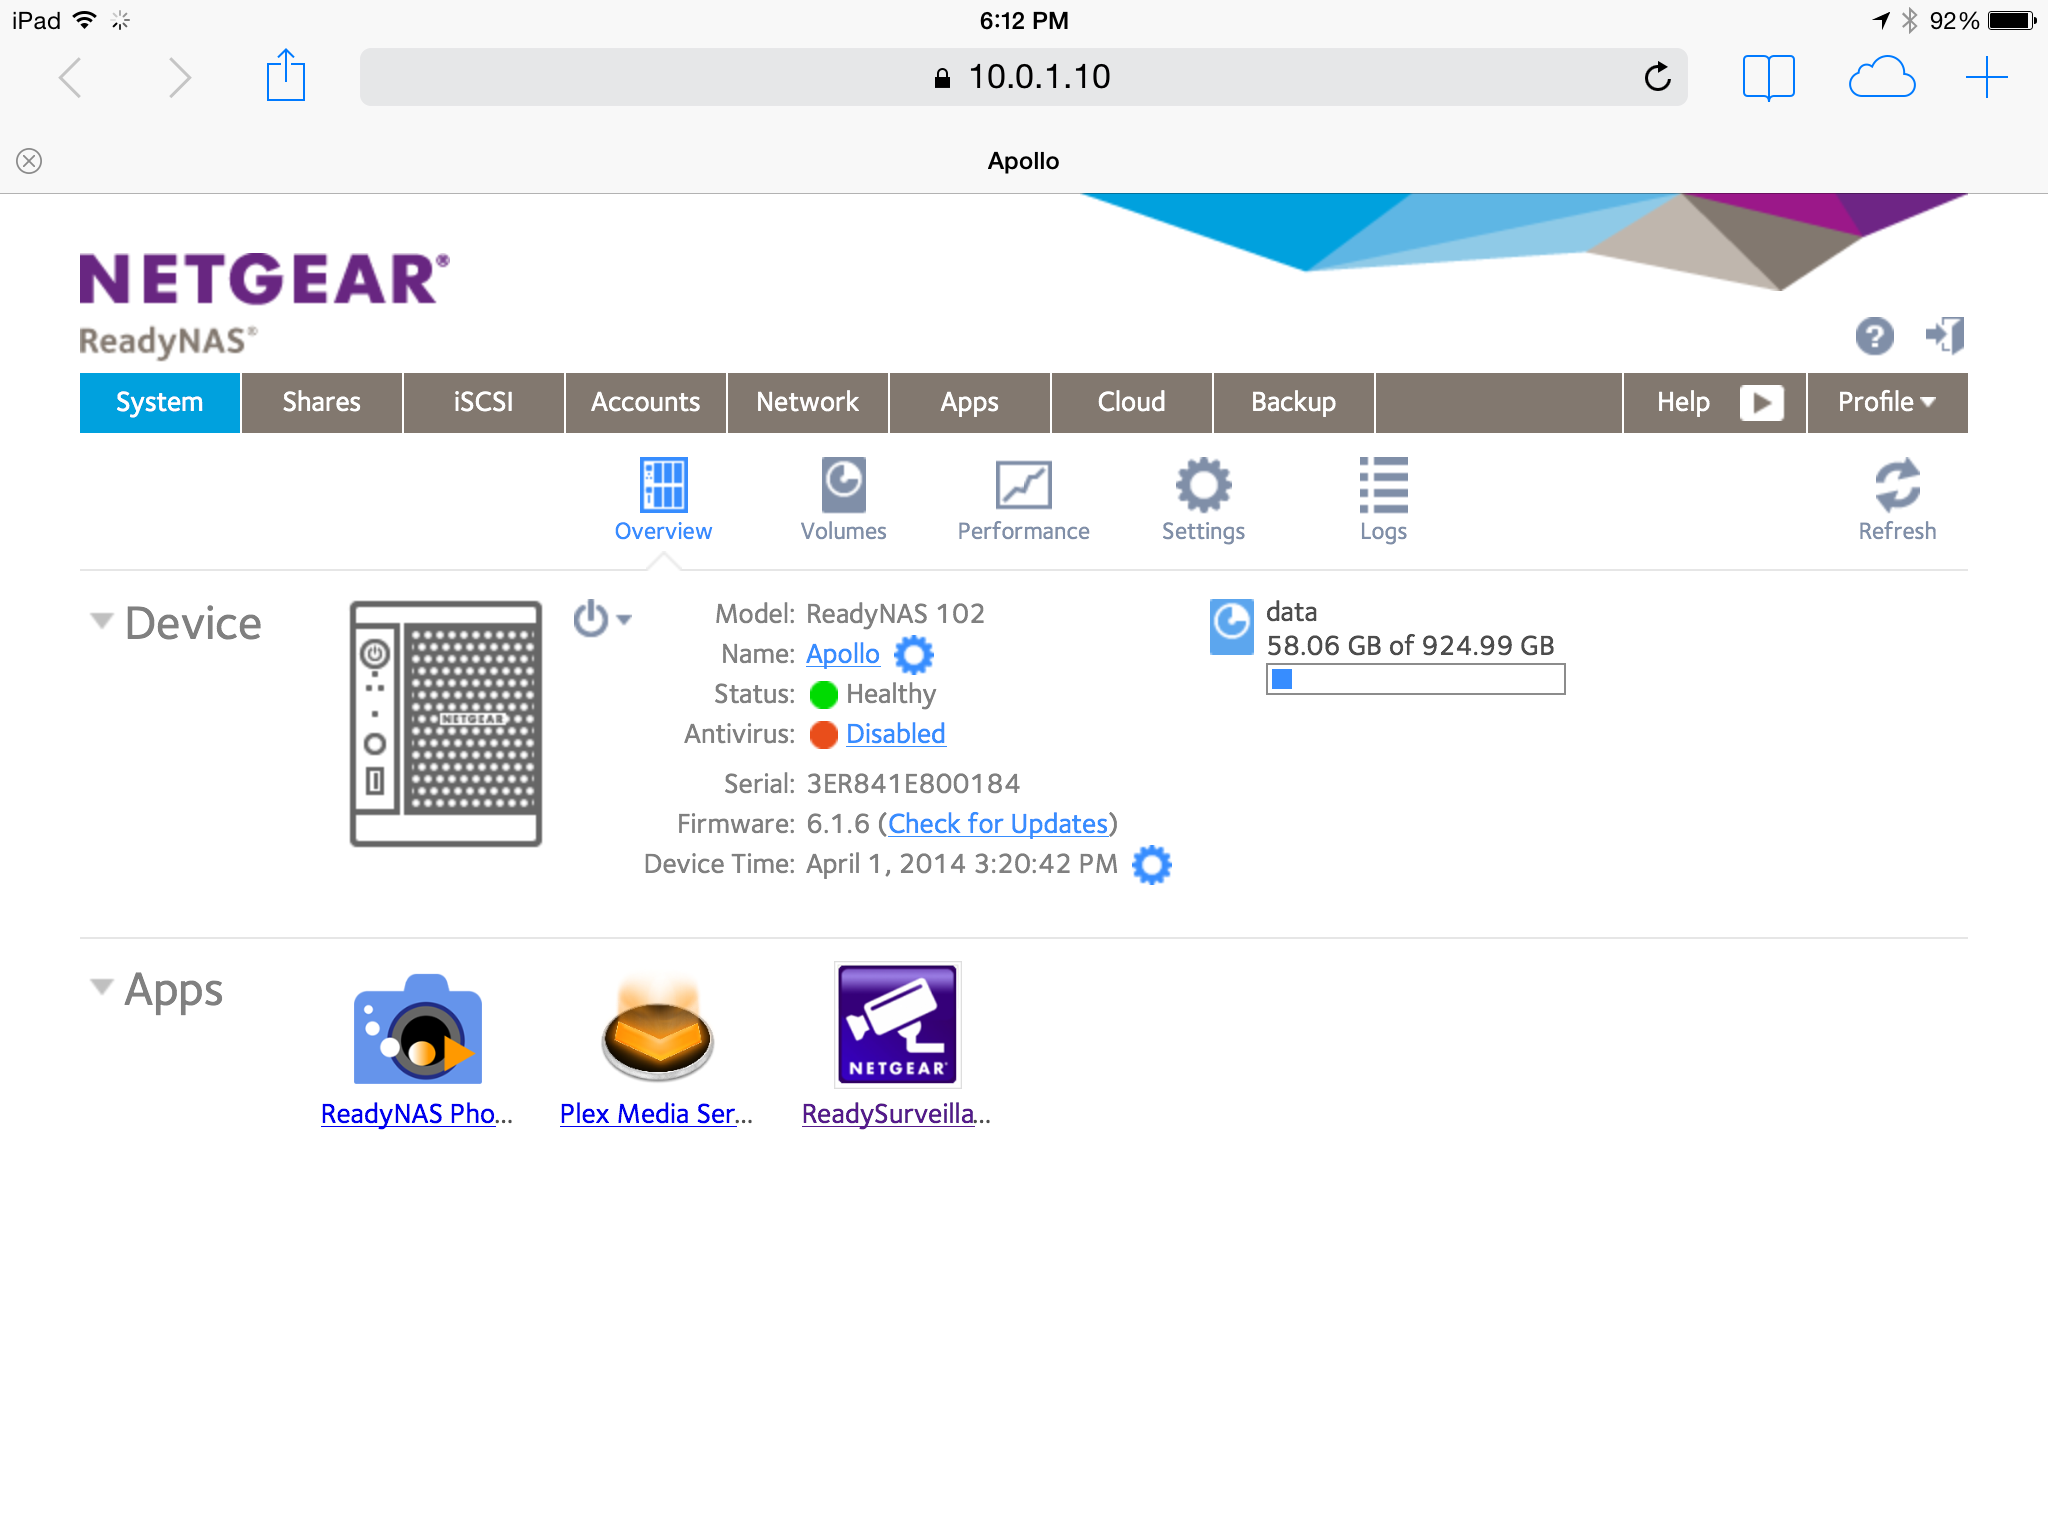
Once you have completed account setup and any firmware updates (6.1.6 at the time of this review),you now have the ability to access your shared folders. The ReadyNAS automatically creates the following shares: Backups, Documents, Music,
Pictures, Videos.
Overall the new OS 6 UI is very appealing and clean. Switching between administration pages is responsive. Unlike other NAS systems that try to provide a more desktop like experience, ReadyNAS OS 6 provides a fairly flat and traditional web layout for administration and content access.
Basic Features
The following are what I would consider the basic features of the ReadyNAS:
- folders – The ReadyNAS
allows you to create multiple shared folders to be access across
multiple devices. As stated in the setup section, the ReadyNAS will
automatically create a few shared folders by default, but you always
have the ability to go in and create more. This is a nice way to
separate out your data whether it’s music, videos, photos, backup, etc. - User Accounts and Permissions
– Along with the ability to create multiple shared folders, you have
the ability to create multiple users and provide the correct permissions
to your shared folders. For instance, you could have a user account
that just has access to the Photos and Videos share, but not Music
share. This is very handy for households that have multiple people
accessing the NAS and you want to maintain the proper permission and
structure. Our household is fairly simple. We just use one account to
access all of our content. I cross my fingers and hope my wife doesn’t
delete everything. Which leads to the next section, backups. - Backups – ReadyNAS supports
backups to the NAS as in content from a computer or mobile device. The
ReadyNAS also provides a way to use Time Machine to backup your Mac.
Once you have your content on the ReadyNAS, you also have the ability
to backup the NAS itself to an external drive or additional ReadyNAS.
The ReadyNAS will allow you to schedule these external backups as well.
Most people think that just having mirrored drive is proper backup
(RAID 1). In a sense it is, but if you ever lose both drives, you’ll
lose everything. You still want to backup your configuration and data to
a separate drive. That way if both your drives go bad, you can always
throw in new ones and restore from an external backup. So if my wife
decided to delete my entire collection of Quantum Leap tv shows, I would
be able to restore the ReadyNAS to a previous state via a USB drive.
The ReadyNAS allows for scheduled backups as well. You can specify a
time for backups and it will only backup what has changed since the last
one. That way you are not filling up external devices with redundant
data. This is a great feature to have. - Remote Access – By using
ReadyCloud, you have the ability to access your content while away from
home. You can browse and upload content via the web browser. To manage
via the actual admin page, you must be on your local network.
My Needs and Usage
So you have a working ReadyNAS with basic operation. You have your
shared folders and users created to your liking. You have uploaded your
content. Now what? Here are the basic things I used the ReadyNAS in no
particular order.
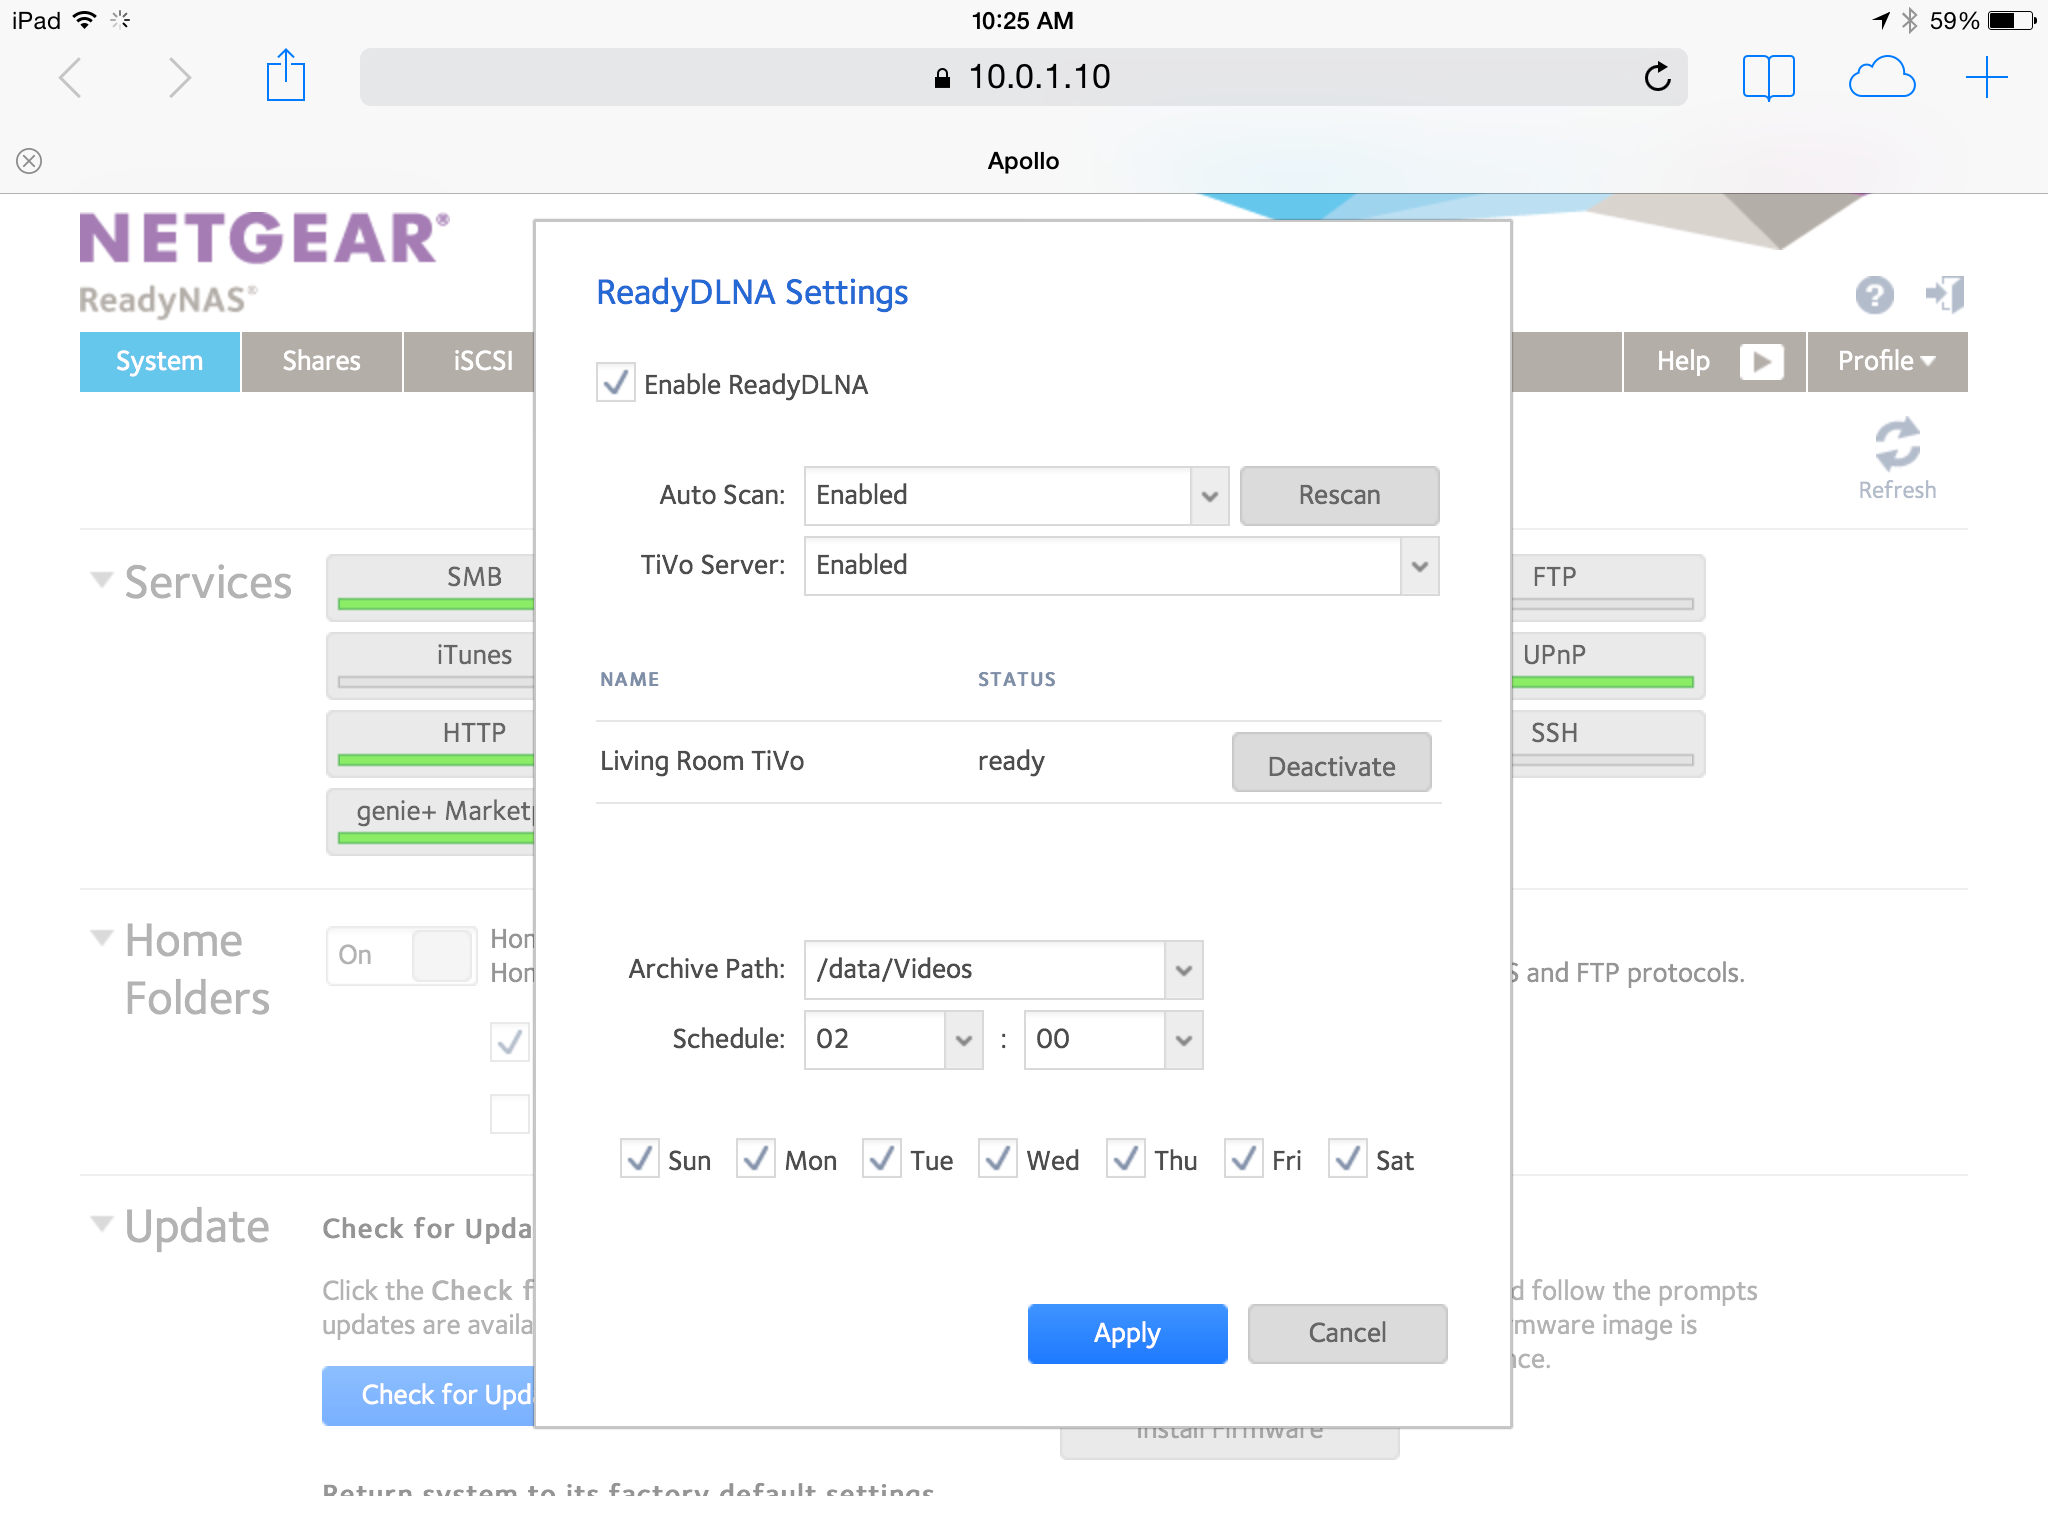
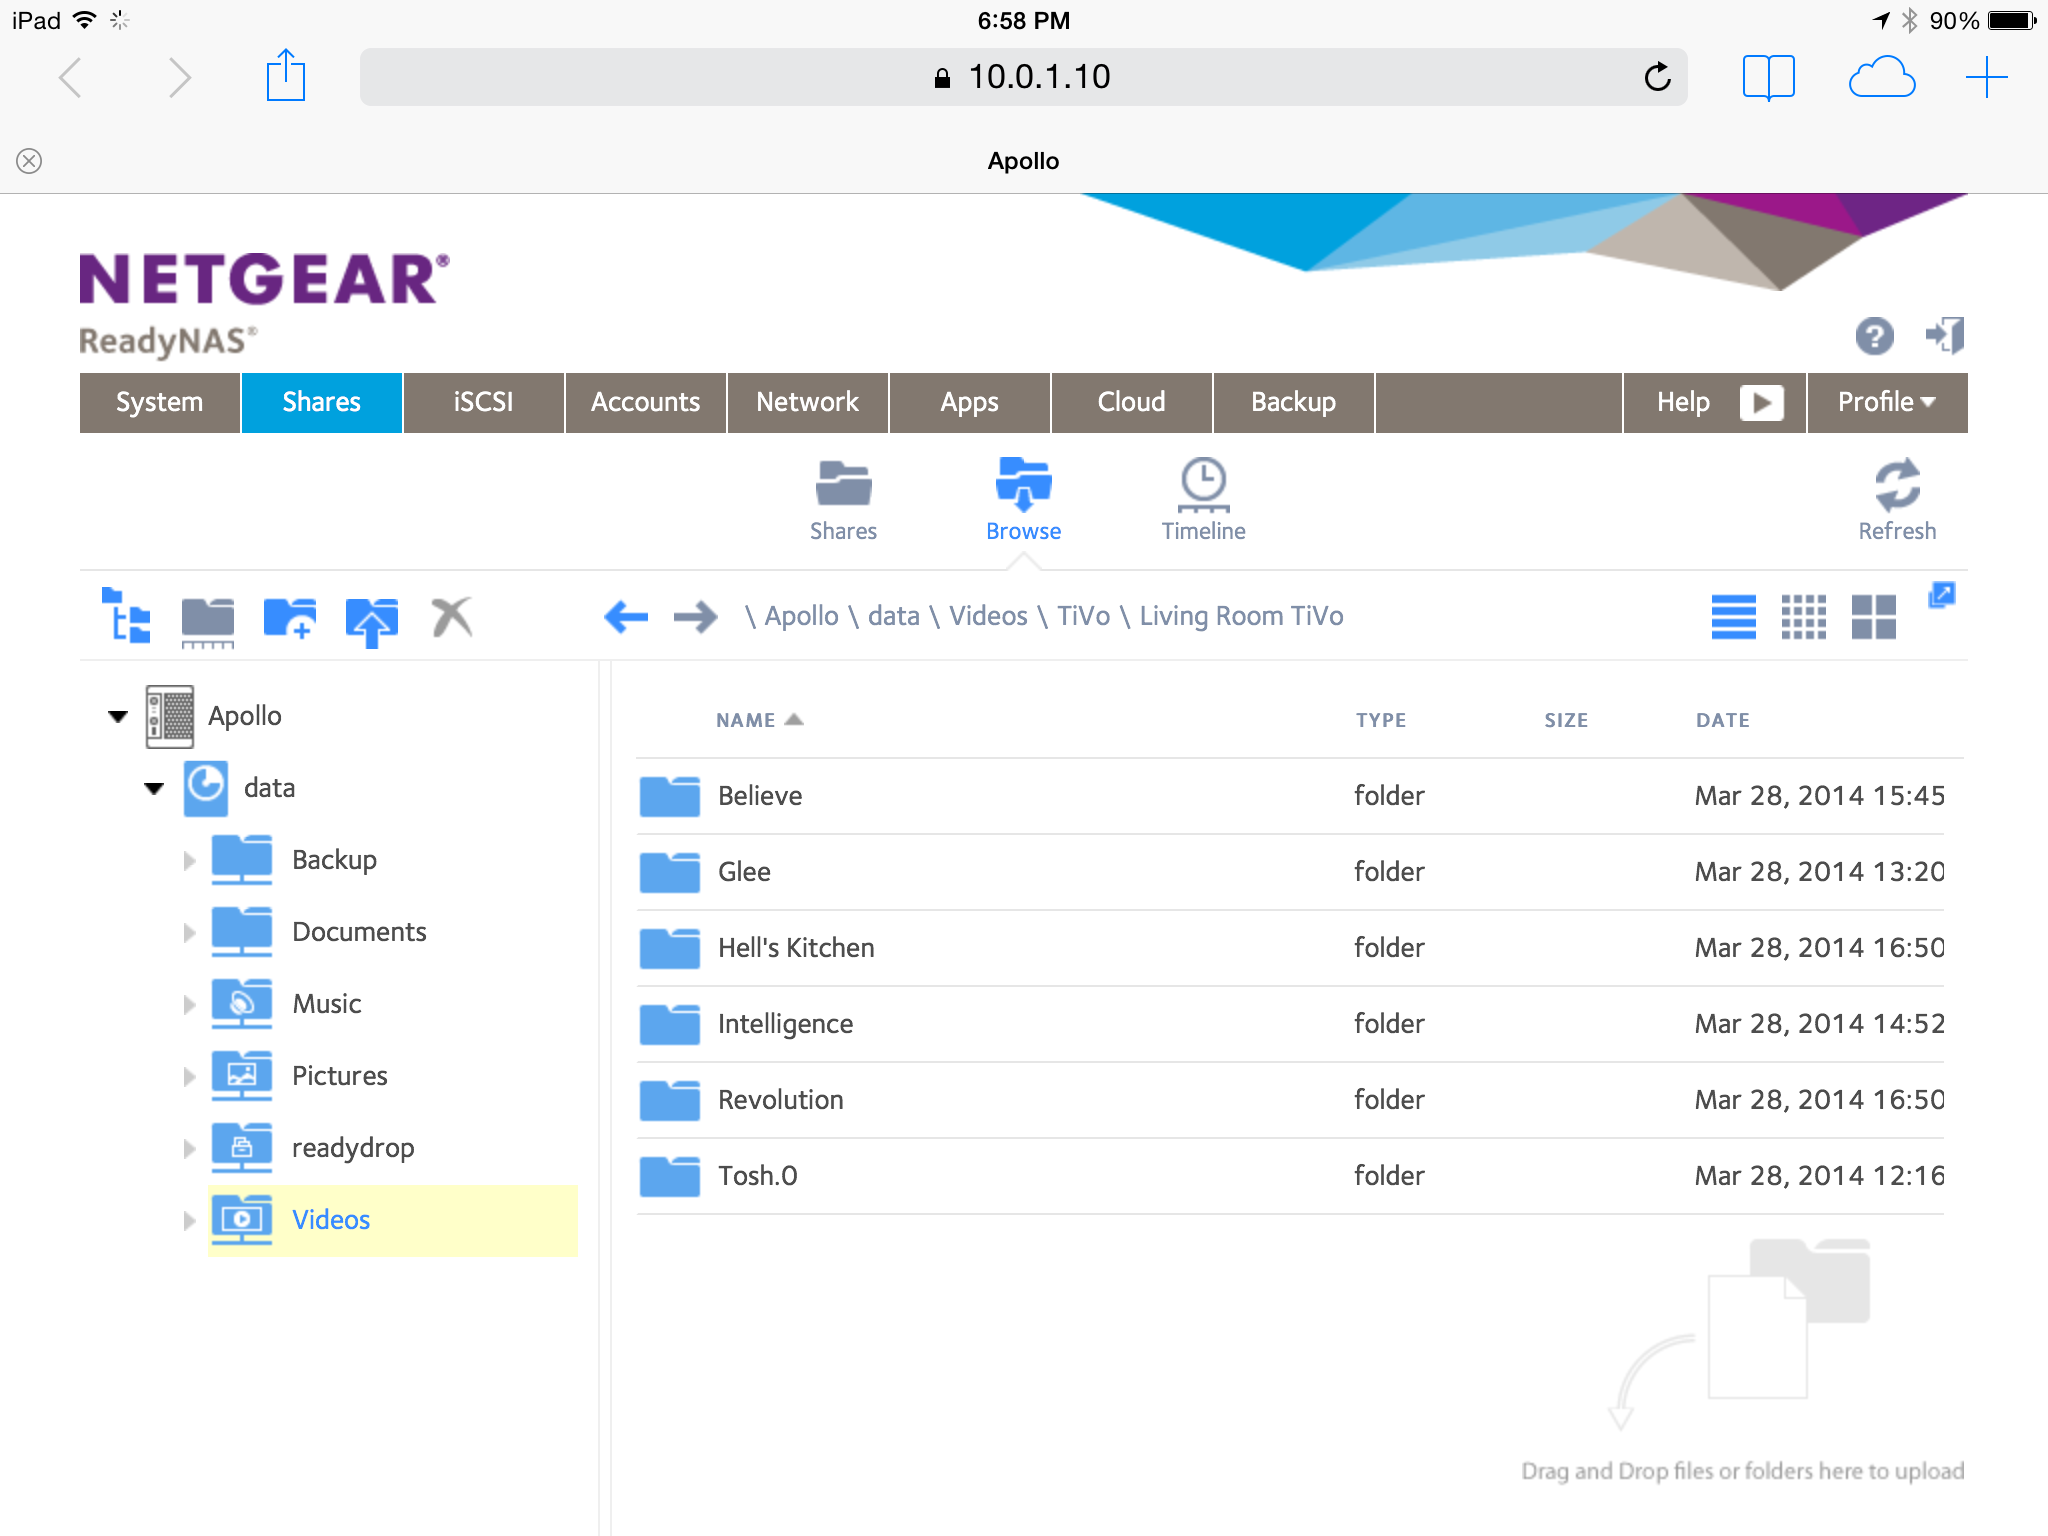
TiVo Backup – By turning on ReadyDLNA, the ReadyNAS allows
you to switch on TiVo archiving. You have the ReadyNAS search for
available TiVos on your local network. Once found, you need to activate
using the Media Access Key (MAC) of your TiVo. You can then schedule a
time when the ReadyNAS will begin archiving. Shows are stored by default
in the Video share under TiVo and then the name of the TiVo that is being archived. This is a great feature for those looking to clear up space on their TiVo boxes.
iOS App – Netgear provides a ReadyCloud app to give you remote
access to the ReadyNAS. The app will automatically find any ReadyNAS
servers you have attached to your ReadyCloud account. You have basic
browsing abilities within the app. For any kind of playback of media,
you must first download, then play. The best feature of the iOS app is
the ability to have automatic photo uploads. The ReadyCloud app will
scan your iOS photo library and then backup to a specified folder on the
ReadyNAS.
Dropbox – Dropbox integration allows for the ReadyNAS to
create a folder in your Apps folder on your Dropbox account. Then any
files put into that folder will be synced between Dropbox and a ReadyNAS
share you designate.
Stream via Roku Media Player (RMP) – Roku has their own app
that allows for DLNA streaming. When you launch the RMP, it will
automatically search for any DLNA server on your local network. It
easily found the ReadyNAS and I was able to browse through my different
media (videos, photos, music). The one gotcha about the app is that
you must be in the proper section for playback or else you will get a
playback error. If you want to watch a video, you need to select the
video channel first, then go into your videos folder for playback. This
might sound like a “duh Adam” moment, but I found that I would be in a
certain playback mode and not be able to find “compatible content”. All
the channels show all the folders, so it can be confusing if you are
just jumping around and don’t realize this.
Plex – An entire article could
be written about the Plex server an app and all the configurations
possible. To keep it simple, I’ll explain my setup. Having Plex
installed on the ReadyNAS, the server combs through all the content I
have uploaded and categorizes it nicely. Plex downloads any relevant
information for each file as well. If you are missing a bunch of
information for movies that you have converted to digital format, Plex will find that for you. My main playback devices are iOS devices, Roku,
and Chromecast.
- iOS – Plex will serve up content to you on the fly. So if
you away from home and want to watch a movie or listen to your music, you can do that (watch those data limits!). Also with the iOS apps, you can use AirPlay to stream to an Apple TV. This works for both videos and music. Recently, Plex also announced automatic photo backup if you
have signed up for their PlexPass. - Chromecast – Google has added a lot of new channels
recently to the Chromecast, Plex being one of them. With the Plex iOS
app, you can select a Chromecast and begin streaming instantly. The
Chromecast will automatically turn on the TV and select the correct input (if your TV has HDMI-CEC), and begin playing what you have selected. The ability to have the TV turn on automatically and switch inputs removes friction. I’ve come to appreciate these little things that remove friction. 🙂 - Plex on Roku – Plex has also created a Roku channel that
allows you to stream content. The app will automatically find any Plex
servers you have and allow you to browse content and playback.
Other 3rd Party Apps – If the above apps aren’t enough for you, Netgear provides a page for other 3rd party apps. You can find them here and either install them manually, or use the Apps section on the web admin page to install.
Conclusion
Netgear has put together a great low cost solution for centralizing your
content. The freshness and speed of the new UI makes setup and configuration very easy. The ability to expand the functionality thru 3rd party apps increases the value of having this unit. I’ve only touched on a few of the features that I found useful. Feel free to explore Netgear’s site for additional apps that may interest you. In the meantime, if you are looking for an inexpensive way to consolidate your data, I would definitely look into a ReadyNAS system.


